

How To Make Night Time Effect In Photoshop
Turn Day to night, AKA: Day for Night in Photoshop Tutorial
Turning day into night, or day for dark as it's chosen in the VFX/Film industry. This technique actually comes from filming during the solar day and then turning it into night with different tricks and mail production. In this Photoshop tutorial, I'm going to prove you how to take a daytime photo and and so turn it into a dark scene.
I'm going to show you my method of day to night, which is a simple 3 footstep process, where we focus on creativity. At that place are some techniques that I apply to set things up. The residual of information technology is brushwork and a couple of tricks. I don't know why, simply this is something I actually enjoy doing. It'south a lot of fun. I'm going to keep this example adequately simple, so that you can follow it hands. Don't worry if your first few attempts don't look keen, keep practicing.
You will want to watch the Day to Night video to come across the workflow.
And then come back and follow the steps on this page to actually do the Photoshop tutorial (and bookmark for reference).
Turning Day to Night in Photoshop, Step by step instructions
There really are just three steps:
- Create night color toning.
- Set up Layer masking.
- Pigment in illumination.
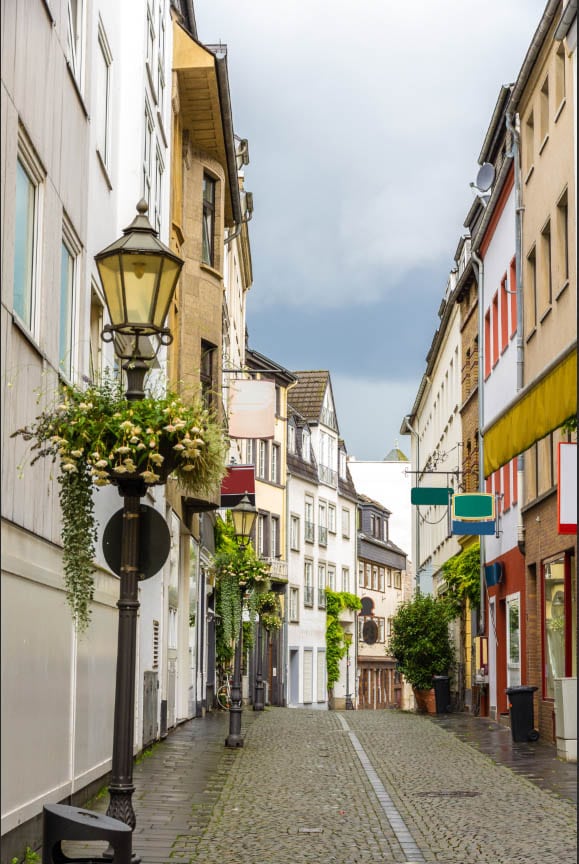
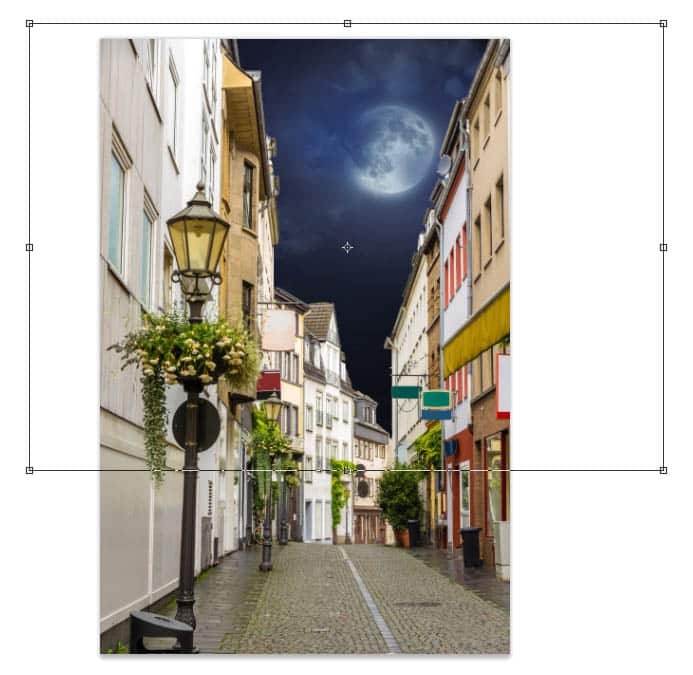
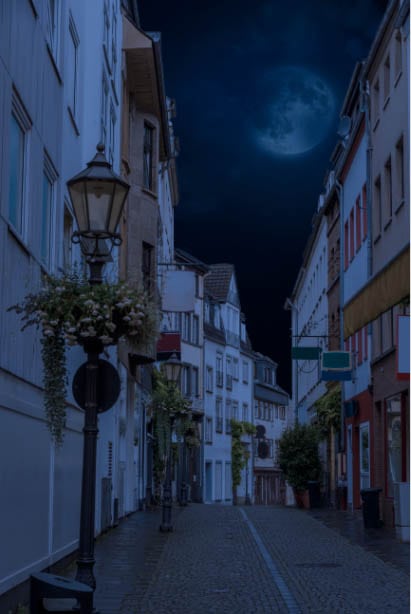
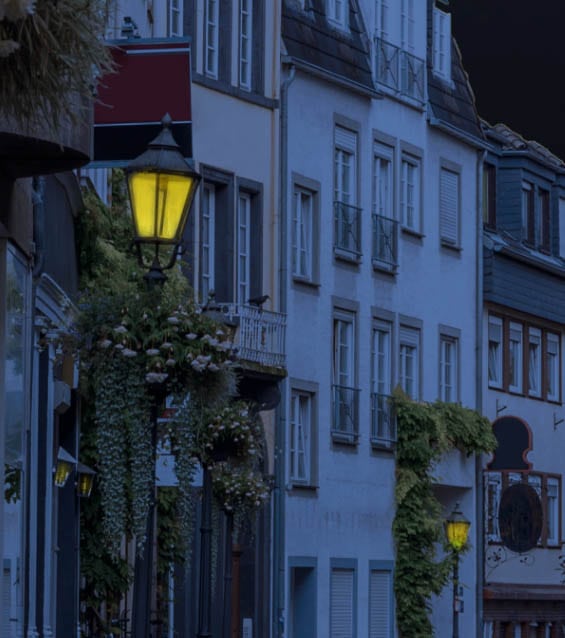
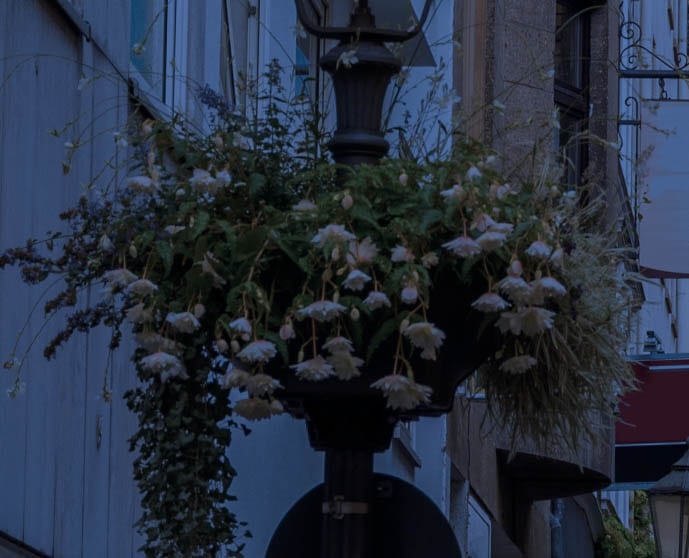
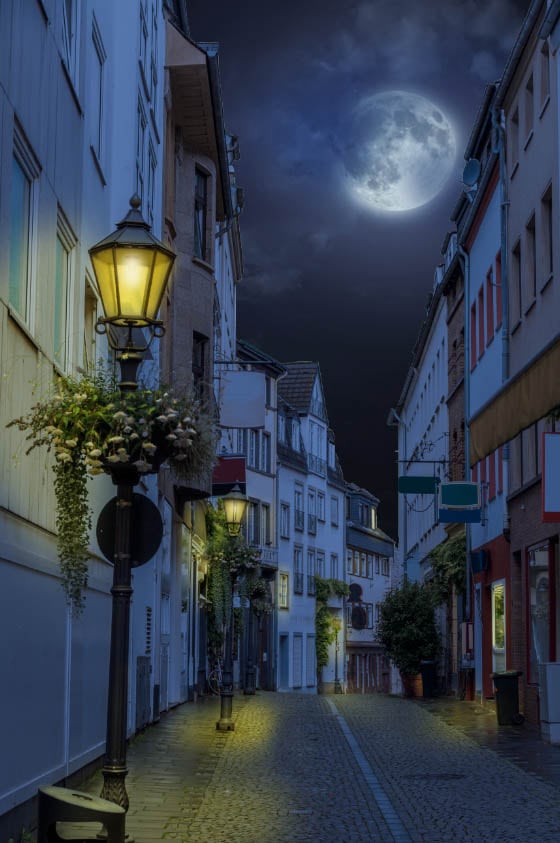
I will split information technology up into a few more simple steps to get in easy to follow for any epitome. Allow's begin with a photograph taken during the twenty-four hour period. To make it easy for you to follow, I take used this image from Adobe Stock.
To assist you become started take hold of 10 free images from Adobe Stock
Become an Adobe Stock Contributor:
Footstep 1. Replacing the 24-hour interval sky, with a night sky
Rather than just darkening downwardly the sky, let'southward actually replace the sky with a nice dark sky. It's the quickest way to go the best result. (When you are doing commercial Photoshop work, information technology's all about speed).
a. Grab the quick option tool.
![]()
b. Drag effectually the sky area to make a choice (Utilize the Alt/Choice primal and elevate to deselect if you become over the lines).
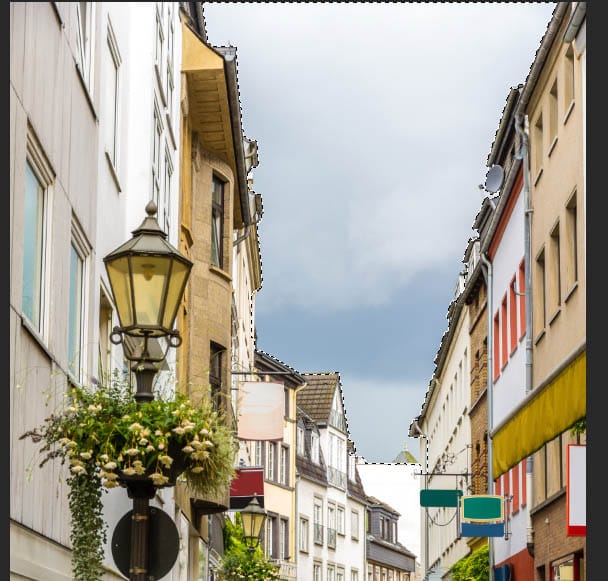
The white wall at the end of the street is very boring and could end up looking similar a mistake, then I take also included it in the pick.

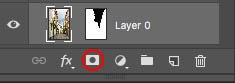
c. When y'all are happy with your selection, click the add layer mask push in the layers console
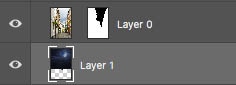
Yous will at present run across a mask and transparency in the heaven.
(If the sky is showing and the buildings are hidden, click on the layer mask and printing Cmd/Ctrl+I to invert the mask.)

At present we need to drop in the sky. Here is another Photo I gabbed from Adobe Stock on the night sky.

d. Bring the sky photograph into our image (don't forget, y'all tin can scout the video at the top to go clarification on steps you lot get lost on).
Hither is an like shooting fish in a barrel tutorial on combining photos in Photoshop
e. Drag the sky to the very bottom so that it's underneath the street scene and then reposition it.
f. Press Cmd/Ctrl+T for free transform.
Shift+Drag on the corner handles to resize the sky photograph and position information technology.
Step ii. How to plough a daytime photograph into night in Photoshop
This is where we will make the photograph look similar its night time, the solar day to night effect happens like so. The good news, is information technology's really easy thank you to LUTS in Photoshop CC.
If you are on an earlier version for Photoshop, do the same affair using Curves (Step iv.c but reverse the curve on the Blueish channel to make it more blue, instead of xanthous).
Brand sure you choose our moving-picture show of the street.
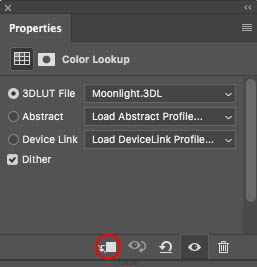
a. In the Adjustment layers in the Layers console, select Color Lookup
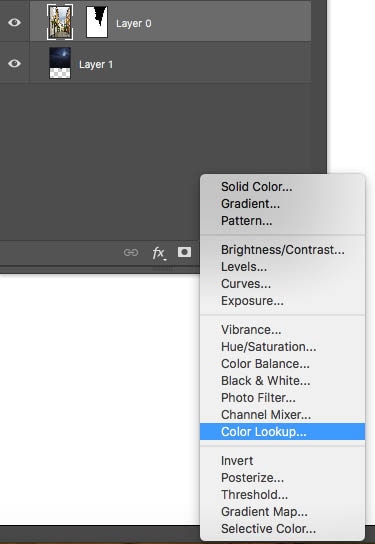
In the properties panel, click on the dropdown, next to 3DDLUT File. We are going to utilize a LUT (Lookup table, information technology's a color and tone preset).
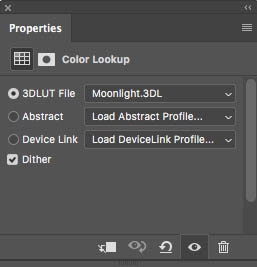
b. Look for Moonlight in the listing

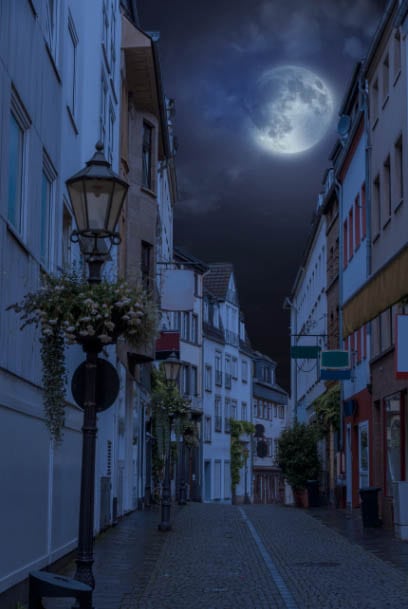
In one case you take selected the moonlight LUT, the photo will at present await similar dark time. This is just the first step, nosotros nevertheless have a lot to practice.
c. I don't like how the LUT is affecting the sky, let's change that. (If you didn't do a sky replacement, you can skip this next footstep).
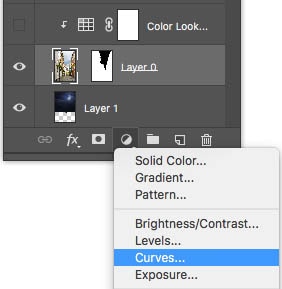
Step 3. Isolating the color from the heaven | Unmarried Layer targeting with Photoshop adjustment layers.
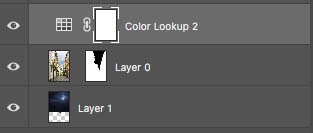
A absurd thing nearly using adjustment layers, we can target all the layers beneath the adjustment, or isolate it to just a single layer. We want to affect the street layer, but non the heaven. Here is how to target a single layer with an aligning layer.
a. Make sure the adjustment layer is directly above the layer we want to bear upon.
b, In the Properties panel, you will run into a piffling foursquare with an arrow. Click information technology
Now the adjustment, volition be clipped to the layer directly below it.
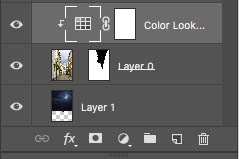
Encounter how the heaven is now it's original color.
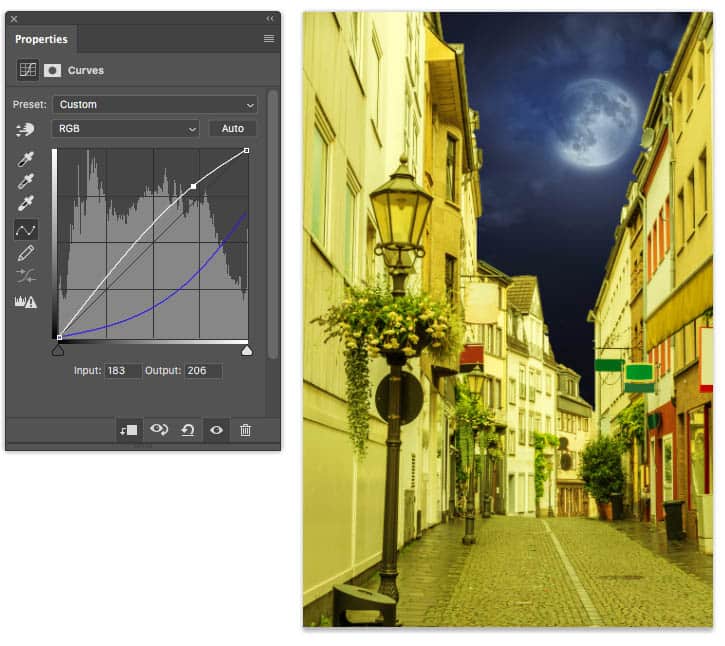
Step four. Preparing the illumination layer in Photoshop
I'thou going to let the cat out of the bag, so you lot know where nosotros are going with this. The adjustment layer is the nighttime scene, we are going to paint on the layer mask to reveal the daytime picture underneath, this will be the street lights and window lights etc, that will make this result convincing. Traditionally, bogus lights are a piffling more yellow considering they are incandescent. (Increasingly, they are existence replaced with daytime counterbalanced LED'southward, just I similar to romantic yellow color and your viewers will too. Permit;s make the scene warmer, or more xanthous.
a, Hide the Color Lookup Aligning layer for at present
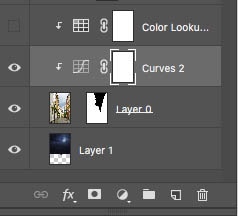
b. Add a Curves Adjustment layer
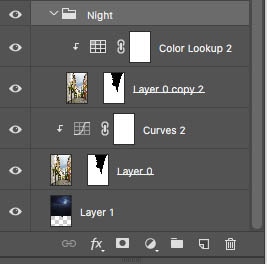
Your Layer stack should expect like this (find that I have clipped the curve too, so nosotros don't change the sky)
c. Click on RGB to reveal the color channels
d. Cull Blue from the driblet-down carte
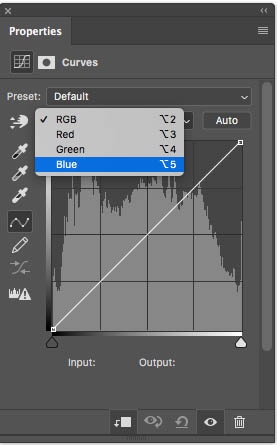
Allow's modify the color to a yellow tint. Blue is the opposite of yellow, and then we demand to reduce the amount of blue.
e. Click to add a point and elevate down in the curve as shown here. Likewise observe I dragged down the highlights on the correct side of the curve. It should look nice and yellow at present.
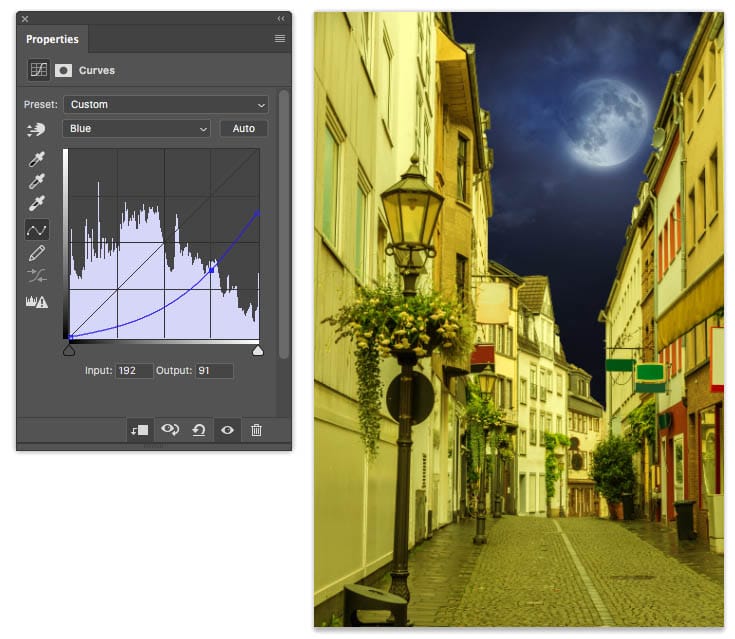
Lets brighten the whole thing upward. Click on RGB in the curves, and so nosotros are adjusting brightness.
f. Elevate upwardly on the curve to make it a trivial brighter as shown.
One final matter to exercise before the existent fun starts. Lets set up 'em upward
Footstep 5. Setting upwardly the Layer Masking magic play tricks
Remember, nosotros will be hiding the night effect with a layer mask to bear witness the daytime underneath. We have to set upward the layers in such a way that at that place will be one mask to rule them all. Hither we go.
a. Indistinguishable the Street layer (Cmd/Ctrl+J)
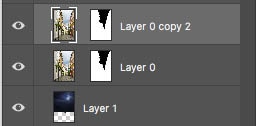
b. Drag the new street layer above the curves layer and sandwich it under the LUT layer.
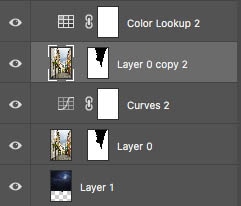
Permit'southward put the night scene into a group to keep it organized.
c. Ctrl/Cmd+Click on the LUT layer, so that both the street layer and the LUT are selected.

d. Press Cmd/Ctrl+One thousand to group them
Name the folder Dark. Good! Almost there
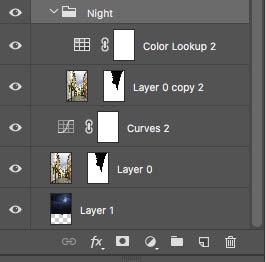
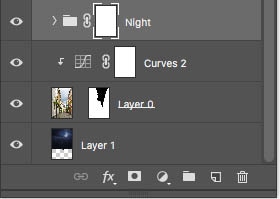
e. With the Night Layer Group selected, go to the top of the Layers console and alter the Blend mode from Pass through to Normal.
(Learn about Layer Blending Modes here)
![]()
![]()
All this moving effectually, the Adjustment Layers may not be clipping to the layer underneath anymore.
Await at Step iii.b to run into how to clip the Adjustment layers (Tip: Move your cursor in the line betwixt the two layers, hold downwardly Alt/Selection until yous see an pointer. Click to clip)
Your Layers console should look like this. (In the video I made a grouping for Day also, that'southward fine too. The important matter is that all the night stuff in above the day.
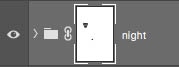
On the Night Layer Group, add together a layer mask.![]()
This mask on the Night Layer group is the primal to the whole enchilada.
Allow'due south test information technology really quick.
Cull a blackness brush, ready opacity to 100 for now.
Brand certain the Dark Layer mask is selected

Paint in the prototype, and y'all should see yellow where you are painting.
If, yes, then you lot are set up to proceed.
If no, STOP. Go back over this Footstep 5 once again and set up it. (Recollect you lot tin can watch the video, and you should watch it first),
Press Cmd/Ctrl+Z to undo your brush stroke.
Brilliant! We have set everything upward. Pat yourself on the back!
Step 6. Painting Low-cal into a night scene in Photoshop.
Alright, here nosotros go! this is the fun part. Nosotros are now going to perform digital magic an paint in light. This is and so much fun!
I'll interruption it into steps, or basic phases for you.
Role 1. Painting basic Illumination. Turn the Lights on in Photoshop
In this step we are going to paint the light sources only. Wait for lights that should be turned on and window light etc.
a. Brand sure that your Night mask is selected.
b. Cull a Soft, black brush. Ready the opacity to 100%.
c. Paint into the first lamp. Notice it changes to yellow. (If you get over the lines, choose a white bush and paint the mask away and the blue will come back)

d. Zoom into the image and paint the other obvious lamps. (Isn't this fun!)
eastward. Likewise choose a few windows that you would like to see lit and paint them. Maybe a doorway or two? Information technology's up to you, be artistic and have fun.

Part 2. Flooding the Lights in Photoshop
Once y'all have painted your low-cal sources, the side by side stride is inundation light.
A light will affect the environment around information technology. Information technology will add pools of light around information technology, afterward all, this is a light's purpose, to illuminate. Allow'southward simulate that at present.
a. Make your brush larger (right-bracket central).
b. Reduce the opacity to around 30% (If you are using a Wacom tablet, set the pressure to Transfer>opacity)
c. Gently paint a pool of light under the street lamp.
d.The low-cal will likewise affect the wall, paint on that too
 a
a
e. Make your castor a petty smaller and practise the same matter for the other lights. Don't forget to add a little glow on the street around the door on the right.
If the ground is wet, the lights will exist a bit brighter considering of the reflections, if it'south dry, they will exist softer.
Softening the lights
Now is a proficient time to soften the low-cal a little, give them a glow. (This likewise serves to even out your castor stokes).
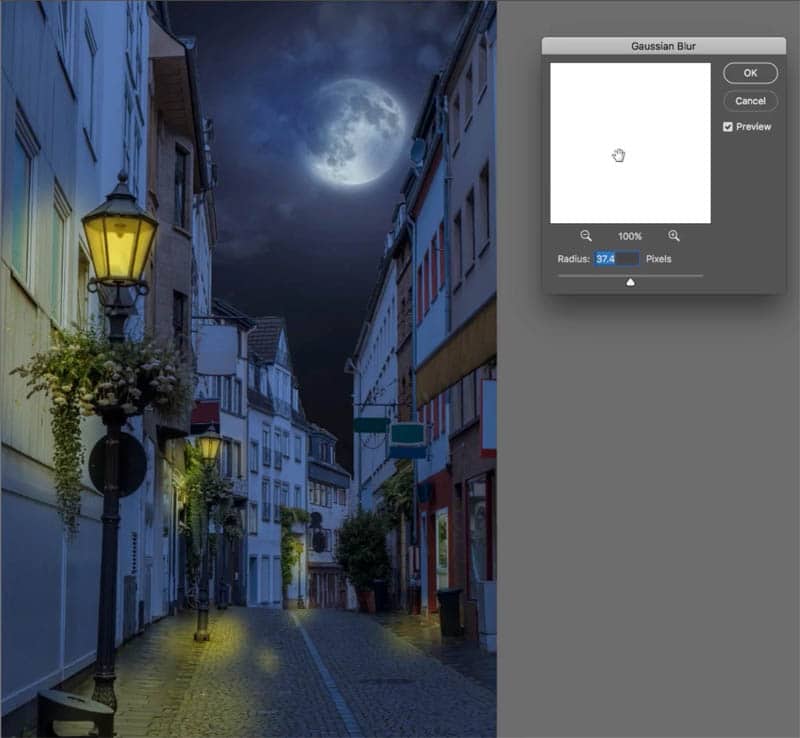
f. With the mask selected, cull Filter>Blur>Gaussian Blur (Blurring the mask will soften the light)
Depending on the consequence you want, nosotros will add a unlike amount of glow. The more atmosphere that would be nowadays makes for more glow. For a foggy night, the number will exist higher (eyeball information technology. If information technology looks adept, it is good). For a crisp dark, the number will be lower.
I have chosen 37.
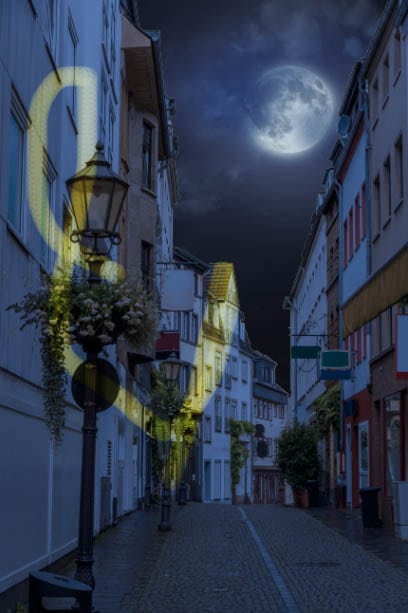
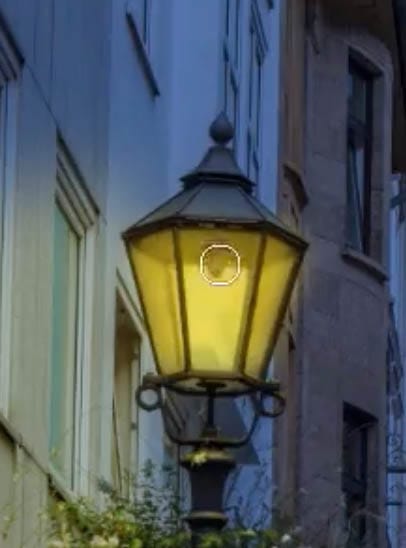
Painting with calorie-free in Photoshop | Light Spill and Rim lighting in Photoshop
This is the step that separates the pros from mediocre. Light will define the shape of things as it spills and catches the edges of 3D objects in real life. The process of thought, is exactly the aforementioned as dodging and burning, simply we are doing information technology with light at nighttime, light painting. We are calculation dimension and shape.
a. Choose 50% opacity on your castor and a menstruation of around 23 or lower if using a tablet.

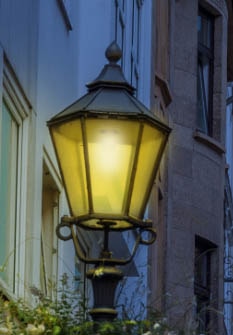
Hither is a close upwards of the lamp to demonstrate
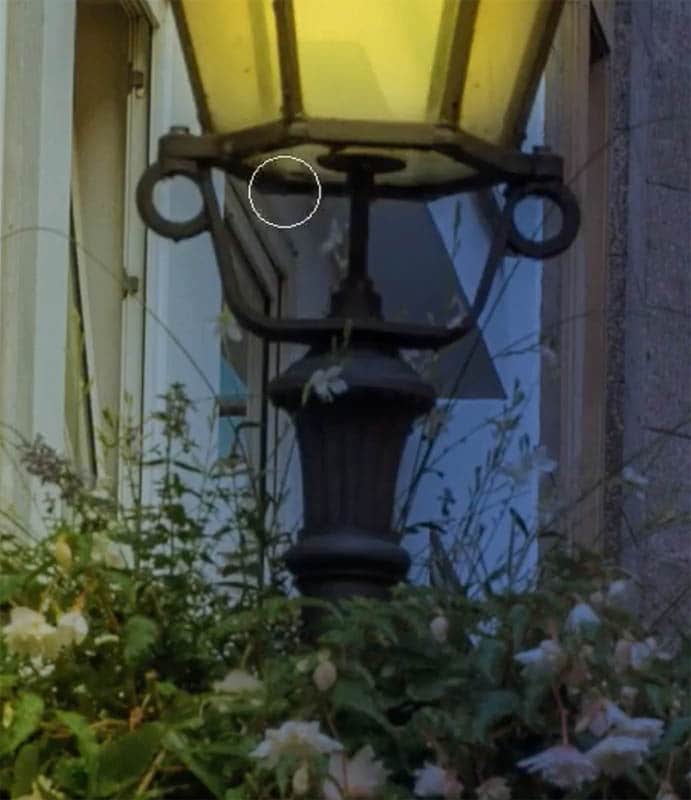
b. Paint effectually the superlative rim that is facing the low-cal bulb.
c. Likewise pigment around the bottom rim
See how it is adding dimension and realism?
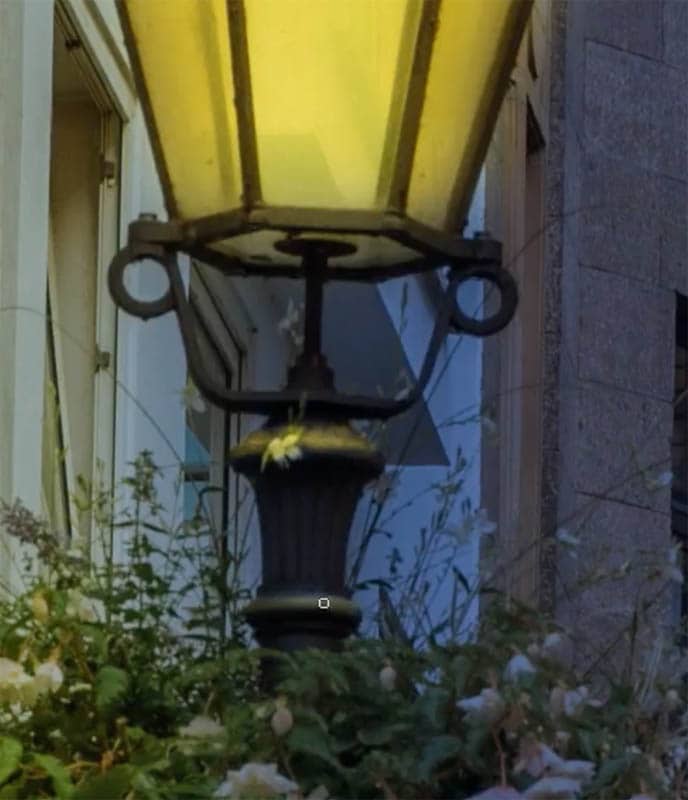
Here is a close up of the foliage under the lamp earlier any light painting
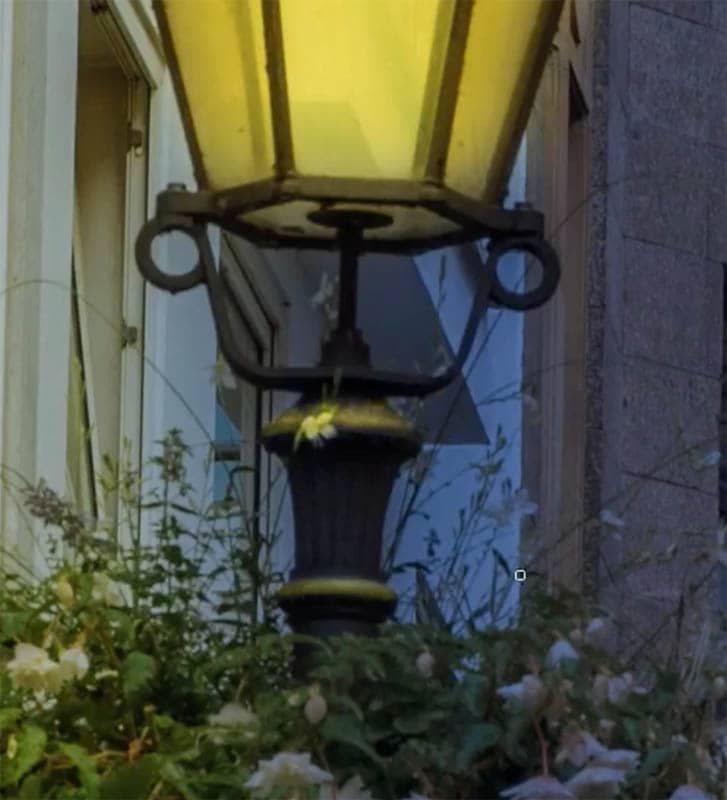
And here is the upshot after painting with lite. Notice that I painted the tops of the leaves and flowers to add depth. This is the stride where you lot can actually sped a lot of fourth dimension, just sculpting the image. I did this fairly quickly, but you can become spectacular results if you invest some existent time into it. Please share them in our facebook group so I can see!

d. Look for other surfaces that would receive low-cal and pigment them

Encounter how much realism is added?

Adding the Specular low-cal
We are almost there! Once last footstep is to add the specular light, or the bright function of the bodily light seedling.
a. Create a new layer on top and name information technology lite.
b. Choose a new foreground color. Make it yellow, buy very bright, almost white, with only a hint of yellow.
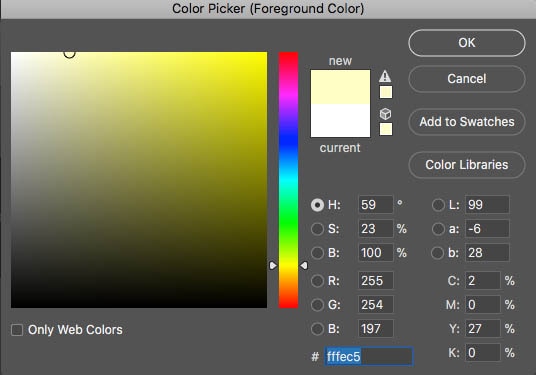
c. Set your brush to 100% opacity and menstruation.
d. Resize it so that the brush is merely a bit bigger than the low-cal bulb.
e. Tap with the bush-league and paint the bright highlight. At present the lights are really on!
f. Repeat for the rest of the light sources.
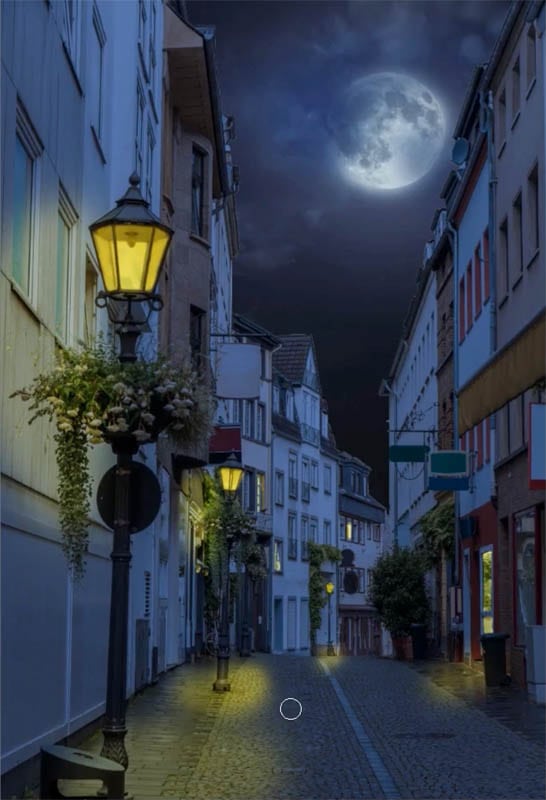
Congratulations, yous have successfully turned 24-hour interval into night! Practice on a few more than images and book mark this page for reference.
I hope you accept enjoyed this tutorial! Although it was a lot of work for me, I really enjoyed making information technology and sharing my techniques with you. Please help spread the word, by sharing this tutorial on Social Media!
Please add together a annotate and let me know your thoughts and also bring together our mailing list so i can inform you of new tutorials every bit I make them.
As well grab my Blending Modes ebook if you haven't already, information technology will teach y'all all the different Layer Blending modes in Photoshop as well as ways to use them (really key in Photoshop). Also information technology'due south costless right now, so its a proficient fourth dimension to go information technology!
It was great to come across you here at the Cafe, check out my other tutorials!
Colin
Source: https://photoshopcafe.com/turn-day-night-photoshop-tutorial/
Posted by: oglespristromer.blogspot.com
0 Response to "How To Make Night Time Effect In Photoshop"
Post a Comment