

How To Make Overhead Pillar Photoshop
How to Add Light Beams to Images in Adobe Photoshop

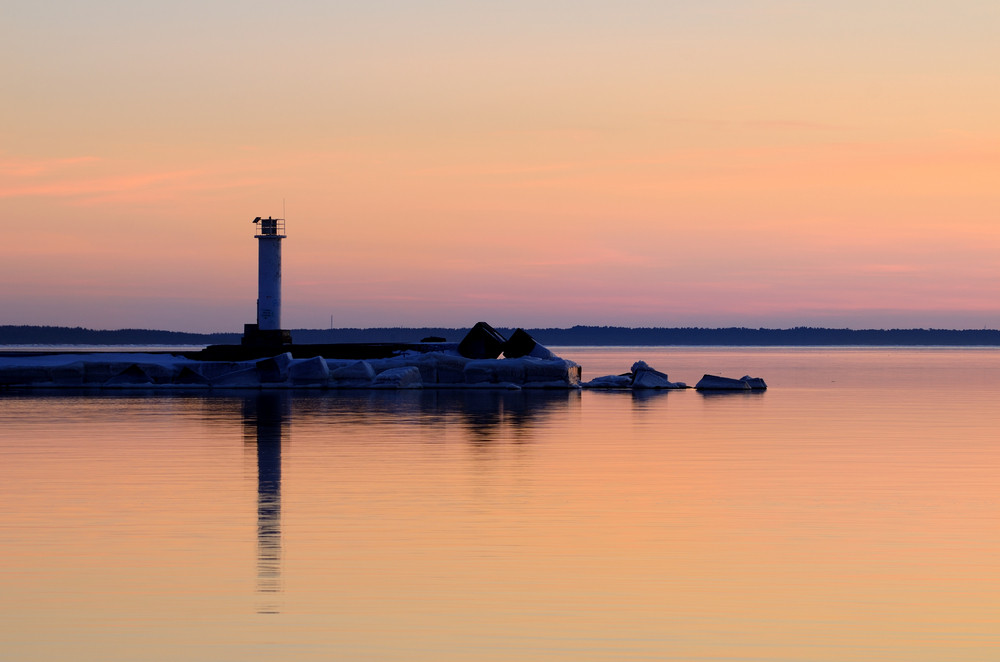
From light sabers to sunrays, in that location are tons of creative ways to add light beams to an image. In this Adobe Photoshop tutorial, we requite new life to a stock epitome of a lighthouse from our library. You can make your vacation photos shine or emulate extraterrestrial activeness in whatever JPEG or PNG—just play around with this absurd effect.
Here's how we turned on the lights in this lighthouse using Photoshop.
Step 1: Open Your Paradigm in Photoshop
Once you've picked an image, you'll commencement need to open information technology in Adobe Photoshop on your calculator. For this tutorial, we used a royalty-free picture of a lighthouse.

Step 2: Lasso a Light Axle
Using the Polygonal Lasso Tool, outline your desired shape of a light axle. Exist sure to make this offset calorie-free beam a bit narrower than y'all would like the final product to appear. We'll exist enlarging it with a 2d beam afterward.

Step 3: Make full the Light Axle with a Gradient
Under the Layer tab, scroll over New Fill Layer and select Slope.

Footstep iv: Fix the Gradient Opacity
In the box that pops upward, set the desired opacity for your gradient. We used around sixty pct. Make sure the colour is None and the way is Normal. Then hit Okay.

Step v: Adjust the Gradient Angle
Depending on which direction you would like the beam to face, you'll need to adjust the gradient bending. In the box that appears, you can type in the desired angle degree. For this epitome, we set it to cipher to brand the low-cal announced to shoot out of the lighthouse.

Pace 6: Convert Gradient to Smart Object
You may see this alert appear after striking Okay. If and so, just click Convert to Smart Object.

Step 7: Blur the Gradient
Side by side, go to the Filter tab in the menu and ringlet downwardly to Blur. Select Gaussian Blur and set the desired radius. For this gradient, we set the radius to 10.

Join Our Artistic Community
Access the all-time video tips, design hacks, and deals straight to your inbox.
Step 8: Outline a 2d Low-cal Beam
Using the Polygonal Lasso Tool, outline your desired shape of a lite beam. This time, make it a bit wider than the gradient axle, though information technology should be nigh the aforementioned size at its narrowest point. In this case, the narrowest point is where information technology meets the lighthouse.

Step ix: Add together a Curves Layer
Click the circular icon in the menu at the bottom correct of the plan and select Curves. A box will open up upwardly with a diagonal line.

Step x: Accommodate the Curves Layer
Drag the midpoint of the line upward until you see the axle fill with the desired amount of light. It should await about as bright every bit the prototype shown.

Step eleven: Mistiness the Curves Layer
Once once more, select the Gaussian Mistiness option from the Filter menu (under Blur). Set the desired radius for the blur and hitting Okay.

Footstep 12: Add a Curves Layer to the Whole Epitome
To adjust the overall lighting of the photo, which helps create a more realistic event, y'all'll need to create another Curves layer. This time, drag the dot in the lower left corner of the Curves box up just a footling.

Step 13: Add together Clouds to the Paradigm
Clouds make a light beam wait more than realistic since moisture is what allows air to hold light. To add a layer of clouds, get to Filter, Render, and select Clouds. A translucent cloud issue will appear.

Pace xiv: Increment the Size of the Clouds
To make the clouds larger, which creates a mistier await, press Command+T. Then take hold of the corner of the clouds layer and elevate outwards to increase the cloud size.

Step fifteen: Castor Away Some of the Clouds
Use the Castor tool to blend away clouds from unwanted areas, leaving the lite beam and a few other spots covered in clouds. Spots of clouds and clouded lite will wait more realistic than a consistent cover of clouds across the whole image.

Stride xvi: Create Another Clouds Layer
Repeat Step #13 to increase the texture and visibility of the clouds.

Step 17: Add a Curves Layer to the Clouds
Press the Adjustment Layer icon in the lower right corner and select Curves. Use the second dropdown bill of fare in the subsequently panel to select Blueish. Drag the line downwardly but a little to increase the warmer, xanthous tones and make the second clouds layer more pronounced.

Step 18: Suit the Colour of the Curves Layer
Using the same dropdown, select the color Red and move the line slightly upwardly.

Stride nineteen: Brush Away Unwanted Clouds
Using the Brush tool, rub abroad some of the clouds to soften the effect. Utilise a round move over the areas you would similar to castor away. Leave some clouds effectually the calorie-free beam and intended lite source, and leave a few patches over reflective areas like h2o.

Stride 20: Group the Layers
Select all the layers in the lower correct console and left click or use CTRL+click. Then select "Grouping from Layers" and a box volition pop up. Hit Okay.

Step 21: Indistinguishable the Grouping
Left click or CTRL+click the group and select Duplicate Grouping. The lite axle will become much brighter. Then add a Layer Mask using the icon in the lower right corner. Use the Castor tool on the light axle.

Step 22: Adapt the Opacity of the Light Axle
Open Group 1 by clicking the arrow adjacent to the folder icon and adapt the Opacity of the light beam layers until they attain your desired brightness. Opacity is at the pinnacle of the Layers panel. Only click information technology and drag the arrow to the pct Opacity that looks the best.

Step 23: Add a Gradient Overlay
To create a realistic glowing effect closer to the source of the low-cal beam in your image, yous'll need to create some other slope. Select the duplicate Group and, using the Gradient tool, become to the upper left-hand corner and select the Foreground to Transparent pick (make certain White is ready as your foreground color). And so click and drag the Slope tool from outside the picture backside the lite source to about halfway across the image. The angle and length of your gradient line will vary depending on the motion-picture show and the desired result.

Relieve Your Image
And you're done! Just salvage your newly glowing image equally whatever file blazon you demand. We chose to save our lighthouse equally a PNG. Get to File, then Save Equally, and select the file type from there.

Here'southward the final product:

And this is what it looked like earlier:
Now that you take the skills to bring a fiddling more than low-cal into the globe, endeavour them out on some of our royalty-gratis images.
- Tags:
- Adobe Photoshop,
- images,
![]()
Source: https://blog.storyblocks.com/tutorials/adobe-photoshop-tutorial-how-to-add-light-beams-to-images/
Posted by: oglespristromer.blogspot.com
0 Response to "How To Make Overhead Pillar Photoshop"
Post a Comment